A Step-by-Step Guide on How to Use MPC Video Renderer
MPC Video Renderer is a video renderer for Windows that is based on Microsoft's DirectShow technology.
It is part of the Media Player Classic - Black Edition (MPC-BE) project, which is a popular open-source media player that is known for its lightweight design and extensive features.
Here's a step-by-step guide on how to use MPC Video Renderer:
Download the latest version of MPC-BE. Once you have downloaded the installer, run it and follow the on-screen instructions to install MPC-BE on your computer.
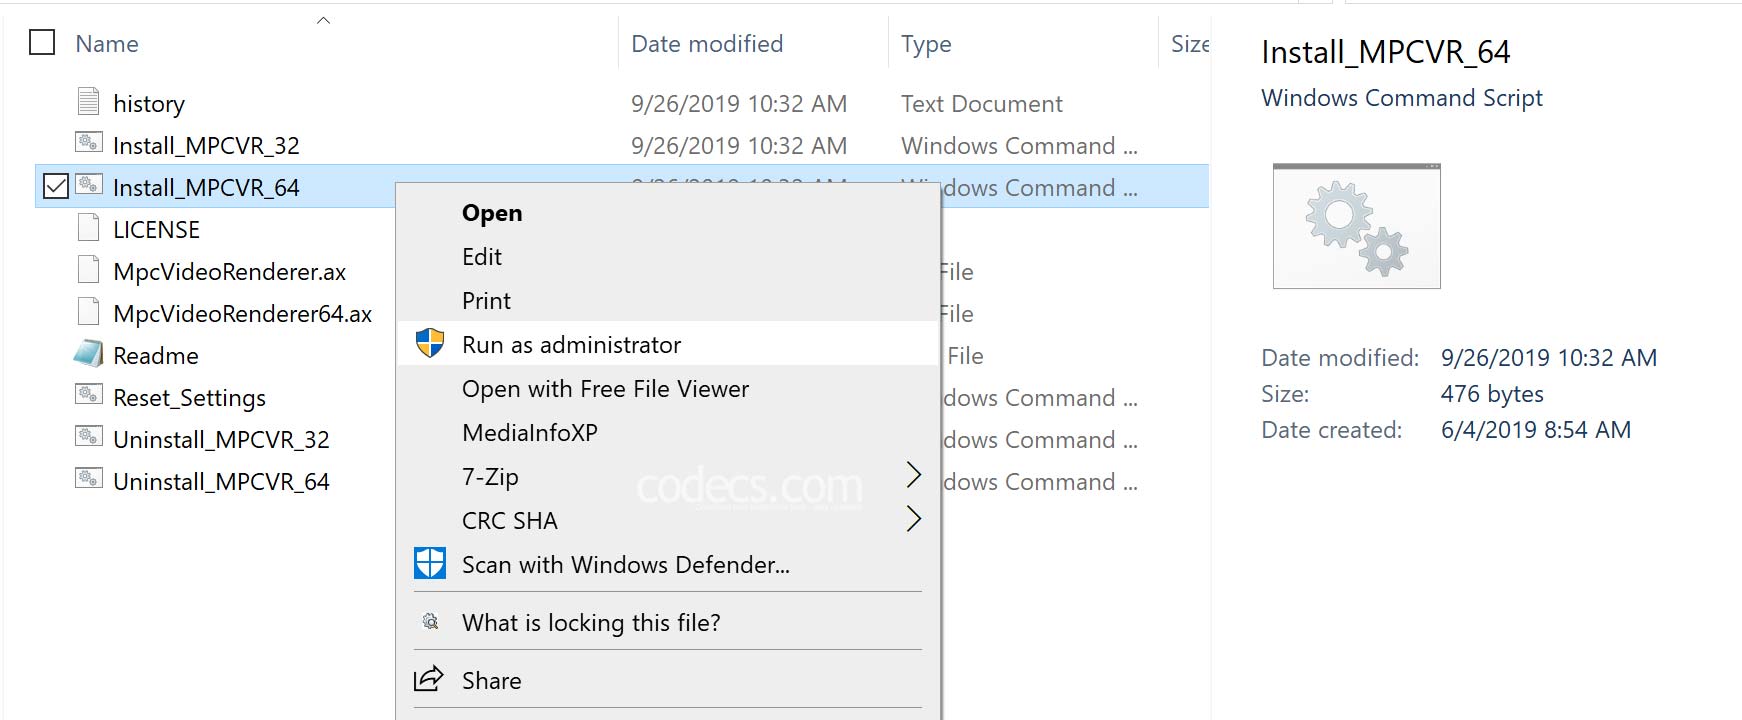
Download the latest version of MPC Video Renderer from our website. Once you have downloaded the archive, extract its contents to a folder on your computer and install the software (see the image above).
Configure MPC Video Renderer
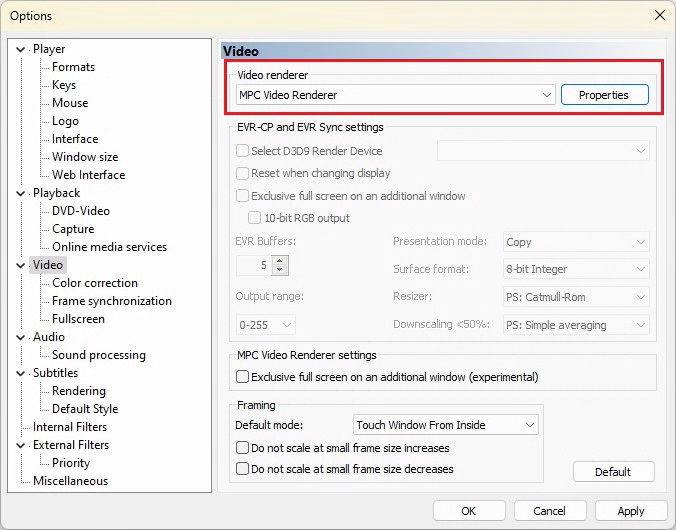
Launch MPC-BE and go to View > Options. In the "Options" window, click on "Video" in the left-hand pane.
Under "Video renderer", click the "Enhanced Video Renderer (custom presenter)" dropdown and select "MPC Video Renderer".
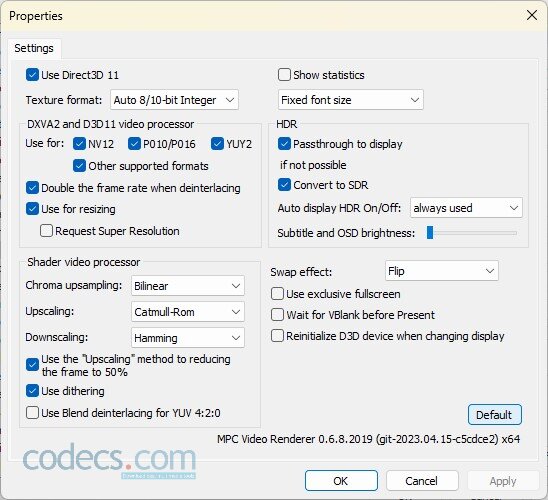
Then, click on "Properties" button to access the settings and adjust them to your preferences; here you can adjust settings such as the shader video processing, swap effects, etc, but we suggest you to stick with default settings - click on "Default" button to reset them.
Play your Video
Once you have configured MPC Video Renderer and adjusted the settings, you can play your video in MPC-BE. MPC Video Renderer should now be used to render the video output, providing high-quality playback with minimal resource usage.
MPC Video Renderer is a powerful and lightweight video renderer that can significantly improve the quality of your video playback experience.
By following these simple steps, you can quickly and easily install and configure MPC Video Renderer to work with your media player of choice, MPC-BE.


