How to Blur or Remove Backgrounds with Hypic
Hypic - Photo Editor & AI Art is packed with tools to give your images a polished, professional look, including options for blurring backgrounds and removing them entirely.
These effects are ideal for emphasizing a subject, creating depth, or adding creative flair.
Hypic offers two great features to help highlight your subject: Mosaic for blurring and Background Removal for creating transparent cutouts. Here’s a simple guide:
Select Your Photo
Launch Hypic app and select the photo you want to work with. The main editing menu will appear at the bottom of the screen.
Using Mosaic to Blur the Background
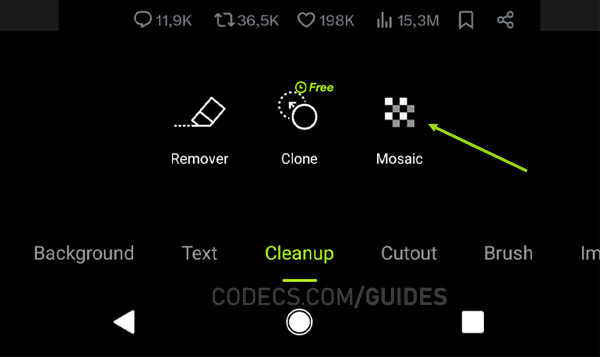
Swipe through the toolbar at the bottom and select the "Cleanup" tool. From the "Cleanup" menu, tap on "Mosaic"
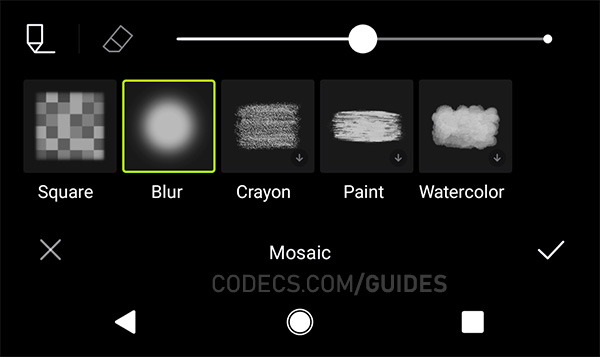
Inside "Mosaic", choose "Blur" This tool lets you blur specific areas, not just the background, so use the brush to apply blur wherever you’d like.
To erase blur from any accidentally blurred areas, use the eraser tool to remove it.
Once you’re satisfied, tap the tick icon at the bottom-right corner to apply the effect.
Removing the Background
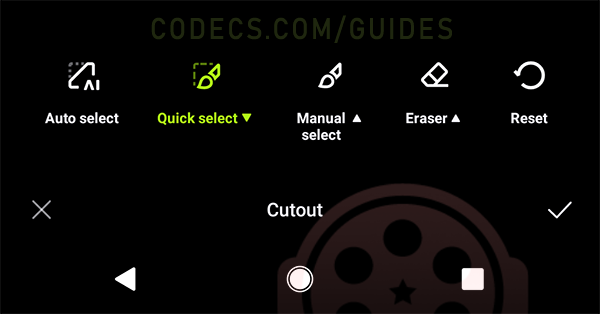
Follow the same steps but this time select the "Cutout" tool in the toolbar.
Hypic’s AI will automatically isolate the subject if you click on "Auto select", removing the background for you.
If needed, use the refine tools ("Quick select", "Manual select", "Eraser") to adjust the edges, adding or erasing parts to perfect the cutout.
Save and Export
When you’re happy with your edits, tap "Save" to keep your new photo or share it straight from Hypic app.


